|
||||||||||
|
||||||||||
| Effects Window (Instantiated
Effects/Synths)
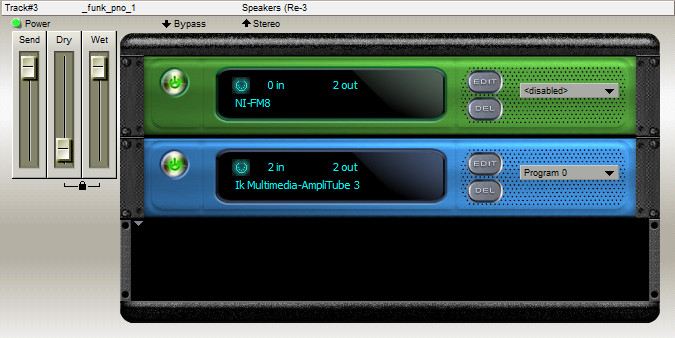
Modern rack editor:
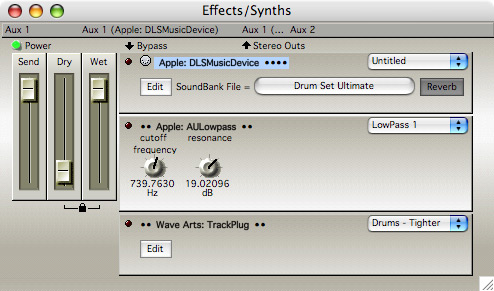
For specific info, click on the appropriate part of the image (of the retro editor) below:
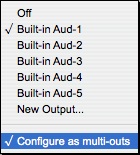
Hint: A plug-ins editor window can be reset to its default size by holding the shift-key while pressing the edit button. Right-click on the track bar to bring up the effects input/output menu:
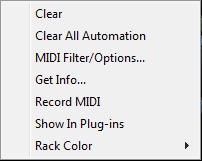
Selecting an item from the inputs or outputs menu will take you to the corresponding window for that item. Sidechain stereo inputs can be selected here for all pairs of stereo inputs to the effect chain. The sidechain audio input will then be fed from the corresponding track. Right-click on the individual rack item to bring up the individual plug-in contextual menu:
Clear All Automation removes all of this plug-in's automation from the selected track or aux buss. Record MIDI, if supported by the plug-in, will enable the plug-in for MIDI input. When enabled, a new input will appear in the graphic editor and track window input select popups. Great care should be taken not to create a MIDI feedback loop. This can happen if you record MIDI and then route the MIDI data, via MIDI-thru, back to the plug-in. Show In Plug-ins will reveal the instantiated plug-in in the plug-ins window. Rack Color can be specified here and will be associated with the category of plug-in, as specified in the plug-ins window. This allows, for example, all reverbs to be red in the rack. Set up plugin on a track or an aux bussTo set up an effect, drag a plug-in from the plug-ins window to the effects window or click the downward pointing grey triangle (as shown in the Modern rack editor picture above) to bring up the plug-in menu. The track bar row, at the top of the effects window, is where you select what to view; a track or aux buss. After a VST or AudioUnit plug-in is dragged to this window, it is installed as a real time effect on the selected track or aux buss. Track or Aux Buss Name PopupClick on the name of the track or aux buss to bring up a popup menu to change to a different track or aux buss. ViewThe generic view contains pan knobs as illustrated above. Click on the pan knob and rotate as you would a real pan knob. If an effect has an editor, there will be an edit button instead of pan knob parameters. Option-drag the plug-in to the effects window to override the editor and display the plug-in in its generic view. Editor views are opened in their own window and that window is added to the window menu.
PresetsPop up windows for each effect allow saving and restoring of presets. Metro automatically scans its folders for preset files that it is aware of. Including its native format, .fxb files and others. Metro (6.0.7 or greater) can be configured so that program changes sent to a plug-in will change the preset (see MIDI Event Filtering). MIDI Event FilteringThe presence of the MIDI icon indicates that this plug-in accepts MIDI data. Clicking on this icon will bring up the MIDI options dialog for effects where you may specify which events reach the plug-in and which events are filtered. Setting up an Aux BussTo set up an aux buss, select Modify Outputs and Busses from the special menu, select 1 for number of busses desired, select the output port and press ok. If you want multiple outputs from an effect you need to create more than one aux buss. You may then assign the outputs to different aux busses (using the aux bus routing popups described below) and even add more effects. Set up an AudioUnit Music EffectIf a MusicEffect is used, the only logical place to use it (because it needs both MIDI and Audio) is on an aux buss. To use a music effect follow these steps.
Selecting Effect and Rearranging the Order of EffectsIf you click on the name of an effect it will become selected. Use clear to clear the effect. Control-click (or right-click) on effect or effect rack to bring up a contentual menu with options to clear automation data and more. The Effects window shows all the real-time Plug-ins assigned to the current track. You can add as many effects to a track as your processor permits, allowing you to add a tremolo effect before a delay, for example. If you have more than one Plug-in assigned to a track, you can rearrange their order by dragging their Name field either up or down. Plug-in effects parameters are directly accessible within the Effect window. Metro’s real-time effects employ in-line signal routing. Effects are inserted into an audio channel in a series configuration with Send and Return controls for the corresponding Audio channel. Each Audio channel requires its own effect configuration. Determining the Number of audio Inputs and Output to an EffectThe number of dots to the left of an effect determines the number of mono audio inputs the effect is expecting. The number of dots to the right of the effect name determines the number of mono audio outputs an effect is outputting. As of version 6.3.6, clicking here will bring up a popup menu(AudioUnit plug-ins only) allowing the user to configure the number of outputs. Thus for the effect chain, the number of inputs will be the number of inputs the first effect in the chain is expecting and the number of outputs will be the number of outputs that the last effect in the chain is providing. If the effect chain is installed on an aux buss the data may be routed with the aux buss routing popups. Prior to 6.3.6, If the number of outputs of the effect chain is greater than two and the effect chain is installed on a track, all outputs except the first two will be lost. Track Multi-Outs
|
|
|
||||||||||


 The Effects window houses Metro's active real-time effects,
including VST-compatible Plug-ins and AudioUnits. Use the
Effects window to view and modify the parameters of real-time
effects and to control the routing of multiple Plug-ins.


