|
||||||||||
|
|
||||||||||
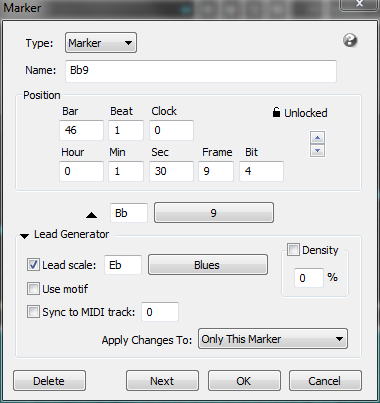
Marker Edit DialogTo edit a Marker or Chord Change, click anywhere between the Marker icon and the end of the Marker text in the Markers row within the Graphic Editor or the Tracks window Overview. Alternatively, from the Graphic Editor, you can double click on an existing marker. Type in the desired edits in the Markers dialog box and click OK. You can also edit Markers from within the Markers window.
A locked marker will keep its time based on hours, minutes, seconds, frames and bits. This is useful for film work. The upward pointing triangle, when clicked, will copy the current chord selection to the name field. Chords are automatically detected when typing into the name field. Lead GeneratorAll options applied here are for the duration of the marker. The duration of the marker is defined as the distance from the beginning of this marker until the next marker or the end of song, if no future markers exist. When the lead scale checkbox is checked, the lead generator will use the scale defined in the scale key and the scale popup fields. When the density checkbox is checked, the density percentage below it will be used. When motif is checked, the marker marks the start of a motif. This is a convenient way to have the lead generator return to a common riff in the song. Simply select which markers contain the motif. When sync to MIDI track is checked, the lead generator will sync to the specified track for the duration of the marker. If 0 is specified for the sync-to track, the lead generator will search for a drum track to sync to. A drum track must be un-archived and in a drum view to be considered. When syncing to a non-drum track, the lead generator will match the rhythms and create harmonies to the original track. See Also: Creating a New Marker Edit Markers Delete Markers and Chord Changes Shifting Markers The Markers Window Name and Set Marker Location |
|
|
||||||||||

